Thursday, January 31, 2013

Fresh And New, With A Twist

Hello Sweets,

Oh man, I cannot seem to catch a break :(  Obviously I did not get my post out yesterday, the reason being I couldn't sleep for the second night in a row and around 1-ish, I crashed...and hard.  I slept until the evening which completely had me disoriented, I honestly thought it was around 4am (I don't have a light up clock in my room) because the house was pretty quiet lol.  On top of that I still don't have much of an appetite (I probably should call my doctor), which then turns into a complete depletion of my energy stores.  So here I am writing yesterdays blog today at 9am and guess what, I didn't sleep last night, wahhhhhh :(  I'm going to try something my doctor's nurse recommended to me, but the hard part will be finding it (and hoping I remember the right name lol).  What do you guys do when you can't sleep?  If I was in Texas right now I wouldn't be having this problem, Nathan has this amazing attribute of making me completely relaxed and I fall asleep much easier :) (maybe it's because I'm in his arms)  But I figured since I'm up, I will try and see what I can get accomplished starting with one of my favorite pastimes, blogging!!

In my last post I was trying to figure out how to get nutrients into me since I have no appetite, which left me with more leftover cantaloupe and I was determine to do something with it that was new to me.  The hardest part was trying to figure out what to create, there were the obvious things like; fruit salad, dried fruit, salsa.  But I wasn't interested in any of those, and then I came across an article (sorry I don't remember which one but I know it was a healthy eating site lol) that talked about alternate ways to eat melons other than the obvious.  Since my regular comfort foods that normally I can eat in situations like this weren't working I decided to try something that was in a close proximity to those, not ice cream and not a Popsicle either, but a sorbet made with fresh fruit.  I have bought a product at the grocery store that is an Italian ice treat, but I think it's what we would consider sorbet because it has the same texture to me, and the flavors are similar.  I did some research to get the basics of what is in sorbet and the process (surprisingly simple and easy), then looked in my fridge to see what mine would consist of.  I now present you with another Canuckette original recipe, enjoy!
*WARNING: mango's are not the easiest to cut up because of the giant pit, don't get discouraged!*

Canuckette's Fresh Fruit Sorbet
Ingredients
2C cantaloupe, cubed
1 mango, cubed
1C granulated sugar
1C water
1/2 lemon, juiced
2Tbs (?) fresh mint, chopped

Directions:
1)  Mix the water and sugar in a small sauce pan, bringing to a boil.  Continually stir while boiling until the sugar is completely dissolved.  Transfer the "simple syrup" to a container and chill in the refrigerator until cool.
 

2)  While the syrup is cooling, combine the remaining ingredients in your blender and mix until the mixture only has small pieces in it (I have a magic bullet so I had to do mine in batches).
 
fresh mint smells so good :)
 

3)  Add the cooled syrup to the fruit mixture and blend until smooth.  Pour the mixture into a shallow metal baking pan, cover and place in the freezer.  Mix the sorbet every 30-40 minutes for the next 4 hours, this is to ensure it has a consistent texture and it's not frozen partially.

4)  Transfer into a plastic container that seals completely, and of course enjoy ;)

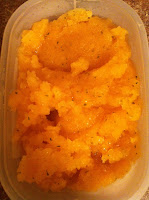
There you have it, a simple and fairly healthy frozen treat.  This particular mix has a fresh and clean taste to it (lol probably a weird way to describe something), the cantaloupe and melon are a perfect blend of sweet, the lemon gives it just enough zing, and the mint added a cool refreshing undertone.  This is definitely something I'll be making again, and I am very proud of myself for trying something new and going with my instincts for what flavor I was looking for, and how to achieve them.  I say that because the mint was a last minute decision while picking up some produce that day, something inside of me told me that I would be pleasantly surprised with the final result and I was right!  You can use any fruit that you like, fresh or frozen (allow to thaw prior), and mix in a little bit of spice or fresh herbs if you're feeling adventurous.  I would love to hear from all of you if you try it, and what your twist or version you've created.

Lately I've been reminiscing about when I was just a wee one, and I am going to be using that as inspiration for my next post or two.  Maybe something simple I haven't had in a while with a story, or maybe take a childhood snack and put an adult twist on it.  I guess you're going to have to come back again and see aren't you?  Until next time...............................


Stay sweet,


Jennifer xoxoxo


Tuesday, January 29, 2013

Summer Lovin'

Hello Sweets,

I hope you all are having a fantastic week :) Mine, as I am sure you can tell by the sporadic posts is meh, for lack of a better word.  It's been another sleepless couple of nights for this girl, which is why this post is going to be short, sweet, and straight to the point.  I promise tomorrow I will have something new and unexpected, even for me, and I am quite excited to share with all of you!

As I mentioned in my last post I had a little something to remind us all of the sun, sand, and fun with friends, and here I am "cool" as a cucumber ready to share with all of you.  What do you think of when you think about summer?  BBQ's, beaches, sunshine, swimming, and many more things I'm sure but the one thing that always comes to my mind, frozen drinks (both virgin and non).  Ironically enough, this is also something that is perfect for me when I can't seem to eat very much, I just pack it full of fruits and protein and then I don't feel as badly about not getting an actual meal.  Now this is just the flavor that I threw together and it's a new one for myself, normally I have more traditional smoothies, but hey use what you have on hand, and you won't know if you will like it unless you try it right?  The only reason I'm not calling this a smoothie is strictly because I didn't have any yogurt on hand, and thought it would be declassified as a "meal" if I had used ice cream, lol I actually made a healthy choice even when I know ice cream is a comfort food for me, huh yay for smartie pants moment!!

Canuckette's Cantaloupe & Apple Icy
Ingredients
3/4C cantaloupe, cubed
1/3C apple juice
1/2C ice (I have a magic bullet so these might be slightly off)

Directions:
1)  Put all the ingredients in your blender (bullet/hand mixer what ever you have), and blend into a frosty treat :)
(mine separated a bit because I let it sit too long)

Well there you have it, a simply sweet and cool refreshing drink good for any time of the year.  Don't be afraid to play around with different fruits, veggies, proteins (both traditional and powders), and what ever else your heart/taste buds are yearning for!

I feel like the world's worst blogger lately, sporadic posts and now short ones too :(, but I am taking care of me and that is probably the best choice I can make right now (even if I feel guilty about it lol).  I am already ahead of the game with tomorrows post (recipe complete), so hopefully I can have a little story to go along with it ;)  Until next time.............................


Stay sweet,


Jennifer xoxoxo

Sunday, January 27, 2013

A "Corny" Sweet Success!

Hello Sweets,

I hope you all had a wonderful weekend, and spent today relaxing on the final day of the weekend :(  My weekend was not too bad, health wasn't a complete blockade (yay for small triumphs lol) and I went right back into the kitchen to create some things I've been  envisioning in my head for what seems like days now.  Now the one thing that my weekend did lack was sleep, and I don't mean only got a few hours or was restless, but actually have only gotten about 7 hours since Thursday night O_O.  Needless to say that today I am a goofy, giggling, zombie just trying to push on through with hopes of a full night sleep tonight (fingers crossed).  Now I am sure you're all wondering why I didn't have a cat nap this afternoon, and the reason is because I made plans to see my grandparents and hate breaking promises to them.  We needed to have a little quality catch up :)  Then when I got home I had to create my final recipe of the "chili" chapters (damn should have thought of that with the first post, lol oh well), and now it's dinner time and I'm afraid that if I fall asleep now I'll awake in the middle of the night lol.

So I am sure you've all been speculating on what the final chapter is, and I've got a pretty good idea that the title may have cemented your guesses :).  If you guessed cornbread you're the grand prize winner...........of the guessing game lol your big prize is my thanks and a smile!  Now I've eaten chili all my life, cornbread however is fairly new to me as it is not common at all where I am from, but that doesn't mean I had never tried it, but when I had it for the first time at Nathan's house I really fell in love with that starchy little devil.  Contrary to what I've had at home, Texas cornbread is moist, sweeter, and has great texture (drools).  When Nathan's dad made chili for us right before I went home, I offered to make some from scratch (they use a box, fore shame!) but he was worried it wouldn't be sweet enough, so in the words of Barney Stinson (How I Met Your Mother - TV series) "Challenge Accepted!".  From then on I've had this burning determination to find the perfect recipe for scrumptious cornbread, and then I stumbled upon a fabulous little web site (obviously a fellow kitchen creator) called A Sweet Pea Chef (love the title too) and there was the start of my great cornbread :)  So I drew inspiration from her recipe and made a few "Canuckette adjustments", to make exactly what I was looking for.  And now I'm going to share it with all of you!

Canuckette's Sweet Cornbread (inspired from A Sweet Pea Chef)
Ingredients
1C all-purpose flour
1C cornmeal, yellow
1/2C granulated sugar
2 1/2Tsp baking powder
1 Tbs brown sugar, dark and heaping
1 Tsp salt
1 egg
1C half and half (the lightest you can find, mine was 50% less fat than original)
1/3C vegetable oil
1/2C creamed corn
3Tbs honey, melted (give or take)


Directions:
1)  Preheat the oven to 400F, and grease (I used coconut oil, so no flour was needed) either a 9" round cake pan or a 12 cup muffin tin.

2)  Combine all dry ingredients (flour, cornmeal, both sugars, baking powder, and salt) in to a large bowl and set aside.

3)  In a separate smaller bowl, combine all the wet ingredients (egg, cream, oil, creamed corn but not the honey).
   
crazy looking layers lol

4)  Add the wet ingredients to the dry ingredients and mix thoroughly, but be careful not to over mix.  Drizzle the melted honey over top of the batter, doing your best to evenly distribute.


This was when I decided to add the honey for a little bit of sweetness on top :)
  
5)  Bake for 20 minutes, or until a toothpick inserted in the center comes out clean.
   
yummers!!

I'm so glad I foraged down this road, specifically because I am not sure how much more I can improve on this recipe, it's honestly that good!  Normally I don't like to toot my own horn, but TOOT TOOT lol.  If you love or even like cornbread then you definitely need to try this recipe, and if you aren't sure if you will like it try this recipe because it's the best I've come across yet!

Well I can barely keep my eyes open as I  finish up this post lol.  That last paragraph took me almost 15 minutes to write because my mind was trying to shut down lol, so it looks like I may be going down for a cat nap after all, and hopefully not all night.  Make sure to come back tomorrow for a simple and refreshing way to forget we are in the middle of winter (if only for a moment).  Until next time..................................


Stay sweet,


Jennifer xoxoxo


Saturday, January 26, 2013

Canuckette's 5 Alarm Chili

Hello Sweets,

This had to be one of the worst weeks I've had in a while :(, my vertigo decided it would see how I liked going back to a childhood memory (spinning on teacups at Disney World, not fun!).  So of course I spent most of the week laying in the dark because my migraines we also especially painful, and then to top it off I felt so sick I couldn't even eat my comfort food O_O.  All in all it wasn't a good week to be in the kitchen creating, mostly because I couldn't even make it to the kitchen lol, but I still have a couple recipes hidden away, plus I think I am going to try something new in the next couple of days.  But for today I am going to pull one out of my stash, because the little I have done today has already proven to be too much :(

So the new recipe I'll be trying in a couple of days will compliment this dish perfectly, that should give y'all something to think about after reading today's post.  As you know my last post was about making my very own chili powder, which was inspired by this very dish that I came across on Hillbilly Housewife's website.  Clearly I am talking about chili lol, and I made my own personal tweaks to the recipe to make it more my own but my inspiration really came from Nathans dad, who made me chili a week or so before I left.  As you all know I am always homesick within days (if not the day) of coming home and to make matters worse I left a little dusting of snow for lots of snow and 18 degree (Fahrenheit), talk about a double downer.  The beauty of this recipe is that (besides the beans) everything is cooked in one pot, that equals less dishes and a happy girl lol.  I bet you're all wondering what makes me think I made a 5 alarm chili, well the original recipe only calls for a tablespoon of chili powder and mine has a whole heck of a lot more (to be accurate the entire amount I made lol oops).  So please heed caution and make it to the heat degree you're comfortable with, now let's get to the yummy goodness shall we?

Canuckette's 5 Alarm Chili (inspired by Hillbilly Housewife) 
Ingredients
1.5lbs ground beef (I use extra lean)
1 medium yellow onion, chopped
3 cloves fresh garlic, chopped
1 large can of tomatoes
1 (tiny) can of tomato paste
3 1/2C cooked beans, pinto or kidney (I used a combination of 3 and eyed the measurements, she also has great instructions to cook the beans if using fresh like me)
1Tbs chili powder (I use A LOT more, but I like spicy things)
 1/4Tsp black pepper, coarse
pinch of salt
1Tbs parsley (if desired)
 

Directions:
1)  In a large pot (at least 4qts), brown the ground beef and soften the chopped onions over medium.  Break the meat into smaller pieces as it cooks, once there is absolutely no pink left in the meat drain off the fat and return to burner.
 

2)  Add the canned tomatoes and tomato paste, add an additional 2-3 cups of water for simmering.
 

3)  Add the cooked beans, chili powder, salt, black pepper, and parsley.  Stir and bring to a boil.
 

4)  Reduce the heat to a simmer, and allow it to cook (covered or not) for about 1 hour and then enjoy!
 nom nom nom :)

I divided up the chili into multiple containers so I could freeze and pull out as needed (I'm only one little girl after all), but you can eat it straight away as a family meal or even bring it to a pot luck (I would turn the spiciness down considerably).  I have a couple of ways I love to eat chili, the traditional way with a little bit of cheese on top, with either cornbread or toast, and (this is going to sound weird) over top of french fries lol.  You can also enjoy it own its own, over rice, or with some crackers as well, but really the possibilities are endless.  Chili is the type of food to warm you from the inside and it's super healthy with all the fiber and protein.

I hope you all enjoy this recipe as much as I do (and still am), it is the perfect food for chilly Canadian winters (or any winter for that matter).   Now I am very confident that most of my readers (if not all) will know what I am making as the final recipe for the three part chili series, but on the off chance you don't, I'm keeping it as a surprise so you'll come back again tomorrow!  Until next time...................


Stay sweet,


Jennifer xoxoxo


Friday, January 25, 2013

Too Hot To Trot!

Hello Sweets,

I'mmmmmmm backkkkkk!!  Well at least for for a short little post, and I am sure you are wondering why for just a short post aren't ya?  Well I haven't slept yet, not a wink, and I am running on fumes lol and when that happens I tend to get a little crazy and loopy, well actually a lot!

Today I have another 2 day recipe extravaganza, well actually it will be a 3 day again but tonight's and tomorrows will combine to make one and the other will be an accompaniment!  As I am sure you are all aware every time I come back from Texas I get home sick right away, and I know my official "home" is here in Canada but my heart is content in Texas :)  Actually I am not just content , I am utterly and completely happy and nothing can ever change that.  So I thought what can I make that will make me feel like I am back in my loves house enjoying a great southern meal?  Well what are Texans known for?  Home cooking, beef, and spicy hotness, which equals....................chili!!

Now I wanted to make this as homemade as possible, which got me thinking; could I make my very own chili spice mix?  Well I'm sure it comes to no ones surprise that yes I can!  And I am pretty sure I would make Nathan proud because it isn't just spicy, it's hot just the way we like it :)  So since I am so exhausted, I decided that tonight's post will be about the simple yet spicy chili spice powder, created by yours truly ;)

Canuckette's Spicy Chili Powder
Ingredients
1 heaping Tsp paprika
2 heaping Tsp ground cumin
2Tsp cayenne (I like real spice, if you don't cut in half)
1 Tsp oregano
2 heaping Tsp garlic (again I love garlic so use at your own discretion)
1 - 1 1/2Tsp chili flakes (again for the spiciness I was going for)

Directions:
1)  Now they are sort of complicated so bare with me, combine all ingredients and seal in an air tight container.  Lol seriously that's all you have to do!
   

Super complicated right?  But the best things in life are just that, simple :)

Well that's about all the energy I have for this evening, but don't forget to come back tomorrow and check out the final product of my chili in all it's glory lol :)  Until next time.............................


Stay sweet,


 Jennifer xoxoxo

Monday, January 21, 2013

Away From The Kitchen

Hello Sweets,

I just wanted to take a moment to let you all know why there has been a lack of posts the last couple of days.  On top of what I normally go through, I have been extremely lethargic and nauseous, which means I haven't been eating or creating :(  But I am resting in hopes to get back into the blogging tomorrow!  Until next time.................


Stay sweet,


Jennifer xoxoxo

Saturday, January 19, 2013

Come Together Right Now, Over Food!

Hello Sweets,

I hope everyone is enjoying their weekend.  Are you staying in, or do you have all sorts of plans?  What have I been doing?  Well today was a write off (so glad I finished my creation last night), so I've been sleeping or resting, so that means I've done nothing lol but hey if that's what my body needs, I'm not going to argue.  Hopefully tomorrow I can get out to visit my grandparents and then I am hoping to make a chili from scratch (or close to it) for the first time, so wish me luck.  With the way the weather is here in the winter, warm comfort food is absolutely amazing!

Well tonight is the night that I finally reveal my original one of a kind creation :)  Did you guess what it could be?  So far the only clues I've given you is that there is candied bacon and a maple butter icing, so I think you've probably already got a pretty good idea what it could be.  If you guessed a "Canadian" inspired cupcake you would be dead on!  Now I will give fair warning that this cake recipe came out a little drier than I would have liked and it is dense (which could be part of it), but I think if I had pulled it out a couple minutes before it was completely set or used the cream that was called for (I used a kitchen trick with regular and butter), things may have worked out differently.  But that is all part of the process, now I know when I make this recipe again to try changing the measurements or ingredients to achieve what I am looking for :)  Let's get to the final part of the mini series!

Vanilla Cinnamon Cake
Ingredients
1C plus 2Tbs butter, softened
1 2/3C sugar
4 large eggs, room temperature
1Tsp vanilla
3C all-purpose flour
2 1/2Tsp baking powder
pinch of salt
2Tsp cinnamon
1 Tsp allspice
1C half and half cream

Directions:
1)  Preheat oven to 375F.  Line 24 muffin cups with cupcake papers (or you can make it into a cake as well).

2)  In a mixing bowl with an electric mixer, combine the butter and sugar.  Beat until light and fluffy, scraping the sides of the bowl to combine everything.

3)  Beat in the eggs and vanilla until smooth and well blended.

4)  In another bowl combine the flour, baking powder, salt, cinnamon, and allspice. 

5)  Stir the dry ingredients into the creamed mixture with the cream until blended.  Beat for 2 minutes.

6)  Fill the cupcake papers about 2/3 full.  Bake for 18 minutes, or until a toothpick inserted comes out clean (although I would pull out slightly sooner).  Cool in the pan for about 2 minutes, then remove and cool completely on a wire rack.

So there is the third and final recipe :)  I then decorated the cupcakes with the icing and candied bacon, and low and behold we have a Canuckette Canadian cupcake!

The flavors are a fantastic blend of salty and sweet up top, then the cupcake base is a play on french toast with the vanilla, cinnamon, and allspice.  

I can say that I am very proud of myself for taking my passion and not just tweaking someones recipe but taking an idea from my big ol' brain and creating it in the kitchen :)  I am definitely going to try and do this more often, because it gives me a great feeling of creativity and I take pride in everything I make, but knowing it's my very own is even better.

I encourage all of my readers, whether your passion is in the kitchen or somewhere else to push yourselves to do something original.  Of course there will be times where we don't succeed the exact way we intend, but as I always say it's a learning curve and you can only learn from the mistakes that are made.  Let me know what you think of my original recipe, and if you try let me know if you like it too!  Until next time.............


Stay sweet,


Jennifer xoxoxo

Love Straight From Natures Heart

Hello Sweets,

I am sorry I didn't get this post to you yesterday, but I had a pretty bad migraine that had me laid up all day :(  But I really wanted to get this creation out of my head and into the oven so I went to bed early last night in hopes of gaining some headway, now I'm not one hundred percent, but I'm able to do part two of the three part creation (and was smart enough to do part three tonight too!).

So when you think of all the gifts we get from nature what do you see?  If you're from Texas maybe you see beef, if you're from Mexico maybe you think of guacamole, but if you're from Canada every child goes to the sugar bush for fresh maple syrup!  So that is precisely the star ingredient in today's post :)  Maple syrup is delicious in a variety of ways but there is one thing that I have never had, and that is maple infused icing, which made me determined to try and create my own.  This is a very simple recipe as it is a butter icing but depending on your sweet tooth you can play around with the measurements.

Maple Butter Icing
Ingredients
3/4C butter, room temperature
4Tbs icing sugar
3Tbs maple syrup or table syrup
 

Directions:
1)  Combine all ingredients in a medium bowl (I started with a couple of tablespoons of the icing sugar to slowly work to the right taste), and with an electric mixer blend until smooth and creamy.

2)  If needed continue to add icing sugar spoonful at a time.  If not using right away store in the refrigerator (remove 1-2 hours before icing cakes).

 There you have it, a simply sweet icing that can be used on a variety of cakes, muffins, or sweet style breads.  Or you can use it the way I did, but you'll have to come back tomorrow for me to tell you that ;).

I know this is a short but sweet post (see what I did there lol), but my shoulders and neck are really sore :(  so I think it's best to call it a night.  Make sure you come back tomorrow for the conclusion of Canuckette's original creation (is it weird that in my head it sounded like the old school batman announcer lol)  Until next time...........


Stay sweet,


Jennifer xoxoxo
 

Wednesday, January 16, 2013

Candied Bacon, Need I Say More?

Hello Sweets,

Well you've made it to the middle of the week :) in a couple of days it will be the weekend again!  Do you have any fun plans considering the unseasonable weather (my Ontario friends)?  So far for me it sounds like it will be a nice quiet weekend, maybe a visit with my favorite little man Miguel (my nephew), which is always a blast.

Lately I've been feeling very blah -_- and frankly I don't like it, so today I decided to get back to my passion and create a recipe from scratch :)  Over the next three posts I will be doing one recipe (three total) and on the final post you'll be able to see the final product.  Now I won't be telling you what I'm making now, but I'm going to treat it sort of like a puzzle :)  With each recipe I want you guys to try and guess as to what is being put together, and I am sure you'll be in the right ball park once you have tomorrows post to combined with today's.  If you think you know what I am making please leave a comment below, I love hearing from all of my lovely readers.

So I know the title of the post tells you exactly what I made today, but honestly what more can I really say about candied bacon lol.  I had never made this before, but since I wanted a completely original Canuckette recipe, I decided to try my hand at it.  I did a little research since I knew I'd be making it in the oven, which is completely foreign to me lol.  I still make bacon the old fashion way  in the frying pan.  Do you ever find that when you think it's an easy straight forward recipe, then you look online for some basics and it seems like everyone does it completely different, and with random ingredients?  Well that is how I felt lol but I felt confident that I had the general knowledge to move forward in my quest, so I went ahead with it and now you will too ;)

Canuckette's Candied Bacon
Ingredients
bacon
dark brown sugar
cinnamon
black pepper
allspice
 
the allspice was a last minute addition, and a good one at that!

Directions:
1)  Preheat oven to 325F.  Line a baking pan with tinfoil (sugar drippings are very hard to clean of a pan), place a wire rack on top and spray very well with cooking spray.  Line bacon across the wire rack.
 

2)  Sprinkle a pinch of pepper and allspice over top, then lightly dust with cinnamon.  Completely coat with brown sugar, make sure to press down to get the sugar to stick and not fall off when you flip to do the other side.  Flip over and repeat.

3)  Place in the preheated oven and bake for about 30 minutes, or until the bacon is a darker brown.  Remove from oven and move to a plate to cool.

4)  Cut into smaller pieces and enjoy on top of many dishes or as a small snack!
the sugar gives it a shimmery look

I am so glad I finally made this (thanks for putting the idea in my head Dave!) because it is the perfect balance of salty and sweet.  Let's just say that everyone who has tried it thinks it's delicious :)

It is killing me to not share the surprise of the final delicious treat, but the mystery is half of the fun right?!  Now I have to go do some more research for tomorrows recipe because I will be giving you yet another Canuckette original, and I am super excited.  What I will tell you is that I'll be utilizing my Canadian roots with tomorrows creation ;)  I am also glad to report that in the time it took to write this post I am already feeling a little better :)  Until next time...............


Stay sweet,


Jennifer xoxoxo